You should apply the plates starting from the left side of application room. You should place the first plate by directing the frontal edges to wall. The distance between wall and a plate must be 10 mm at least.
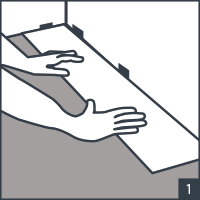
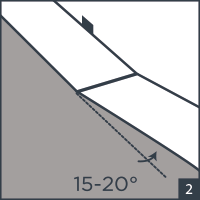
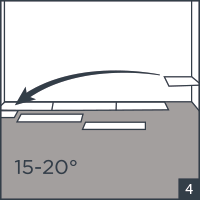
Subsequently, the next plate should be engaged to the first plate through the top with a 15-20° angle, and should be settled by pressing on it until a “click” is heard.
You should follow this procedure until the end of the line. Upon completion of a line, you should reverse the latest plate and cut as required. After that, you should roll again and engage at the end of the line.
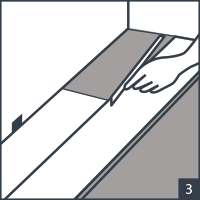
You can keep the remaining part of a cut plate and use it in the beginning of a next line. This plate must be 20 cm at least.
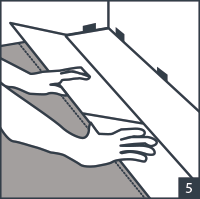
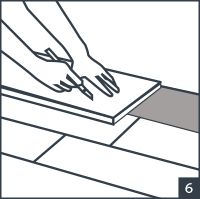
The second plate of the second line should be engaged through the top of the first plate with a 15-20° angle, and should be settled by pressing until a “click” is heard. During this process, you can slightly raise the first plate and ensure that the second part settles to the gap of the first plate. Later on, you should slightly press on all the parts towards the ground.
You should cut all the plates according to the remaining gap for the last line. Please ensure that the distance between wall and a plate is 10 mm at least. Furthermore, please do not forget that expansion joint/grout will be required for places 15 m and wider or longer.
Assembly Methods
Click; Easy to assemble - can be disassembled, the installation process is clean, quiet and short-lived. Provides a unique silence while living and practicing.
Dry back; It provides a clean and dust-free installation. You can create decorative patterns and warm floor combinations using a combination of different models.